Solar Pearl Road Stud
RSPS-2 -F(Flash) -S(Steady)
Key Features:
YDM 1st solar road stud, over 22 years history. Smooth shape without sharp corner.
Spot lighting:
Polycarbonate epoxy filler
116Ø*H25mm
0.292kg
Red blue green yellow white
IP 68
-
-
Sizeφ116*25mm
-
Net Weight0.292kg
-
MaterialPC shell with epoxy filler;White epoxy filler
-
LEDφ5mm, one-way 3pcs, two-way 6pcs
-
LED Working ModeSteady or Flash (2HZ or upon request)
-
Luminous intensity5000mcd
-
View distanceover 500m
-
ColorRed/Yellow/White/Blue/Green
-
Solar PanelMonocrystalline silicon 5V 60MA
-
BatteryAnti-heat Li battery /3.2V 500MAH
-
Battery Life spanMore than 3 years
-
Charge time8 hours @100 Klux(sunny day)
-
Working time72 hours
-
Activationphoto sensor
-
Starting intensity500Lux
-
Compression resistanceover 10 tons
-
Working temperature-20℃~+70℃
-
Ingress ProtectionIP68
-
WarrantyOne year
-
-
Installation:
1. Before installation, solar road studs shall be charged under sunlight for 1 hr, to check the studs can work normally.
2. Placing security isolation facilities for installation work is most important and must not be ignored. In the whole process of dynamic construction, no matter in an new closed road or a running road, every installers shall be in the isolation area. If in a running road, the ratio between security personnel and the installing personnel shall be 1:1; If in a closed road, 1:3.
3. Locate the installing position and ensure it is flat. For curving, cracked or uneven pavement, straighten it prior to installation.
4. Clean the installation location with a brush, meanwhile ensure the location is dry.
5. Glue the road stud thoroughly with proper amount of epoxy glue.
6. Firmly mount the stud on the fixing location & ensure the lighting part is facing the right traffic direction. Do clean the spilled epoxy glue if excessive amount is used.
7. Inspect the installed studs within 2hrs after installation, ensuring that all the studs are fixed in correct direction or not crooked.
8. Remove the isolation facilities in 4hrs after the stud’s installing glue is thoroughly cured.Application:
• Road Delineation
• Accident black-spots / cluster sites
• Hazardous road layouts
• Areas adversely affected by poor visibility
• Cycle path
• Car parksCarton:
38*27*27cm GW:300g/pc NW: 292g/pc 48pcs/carton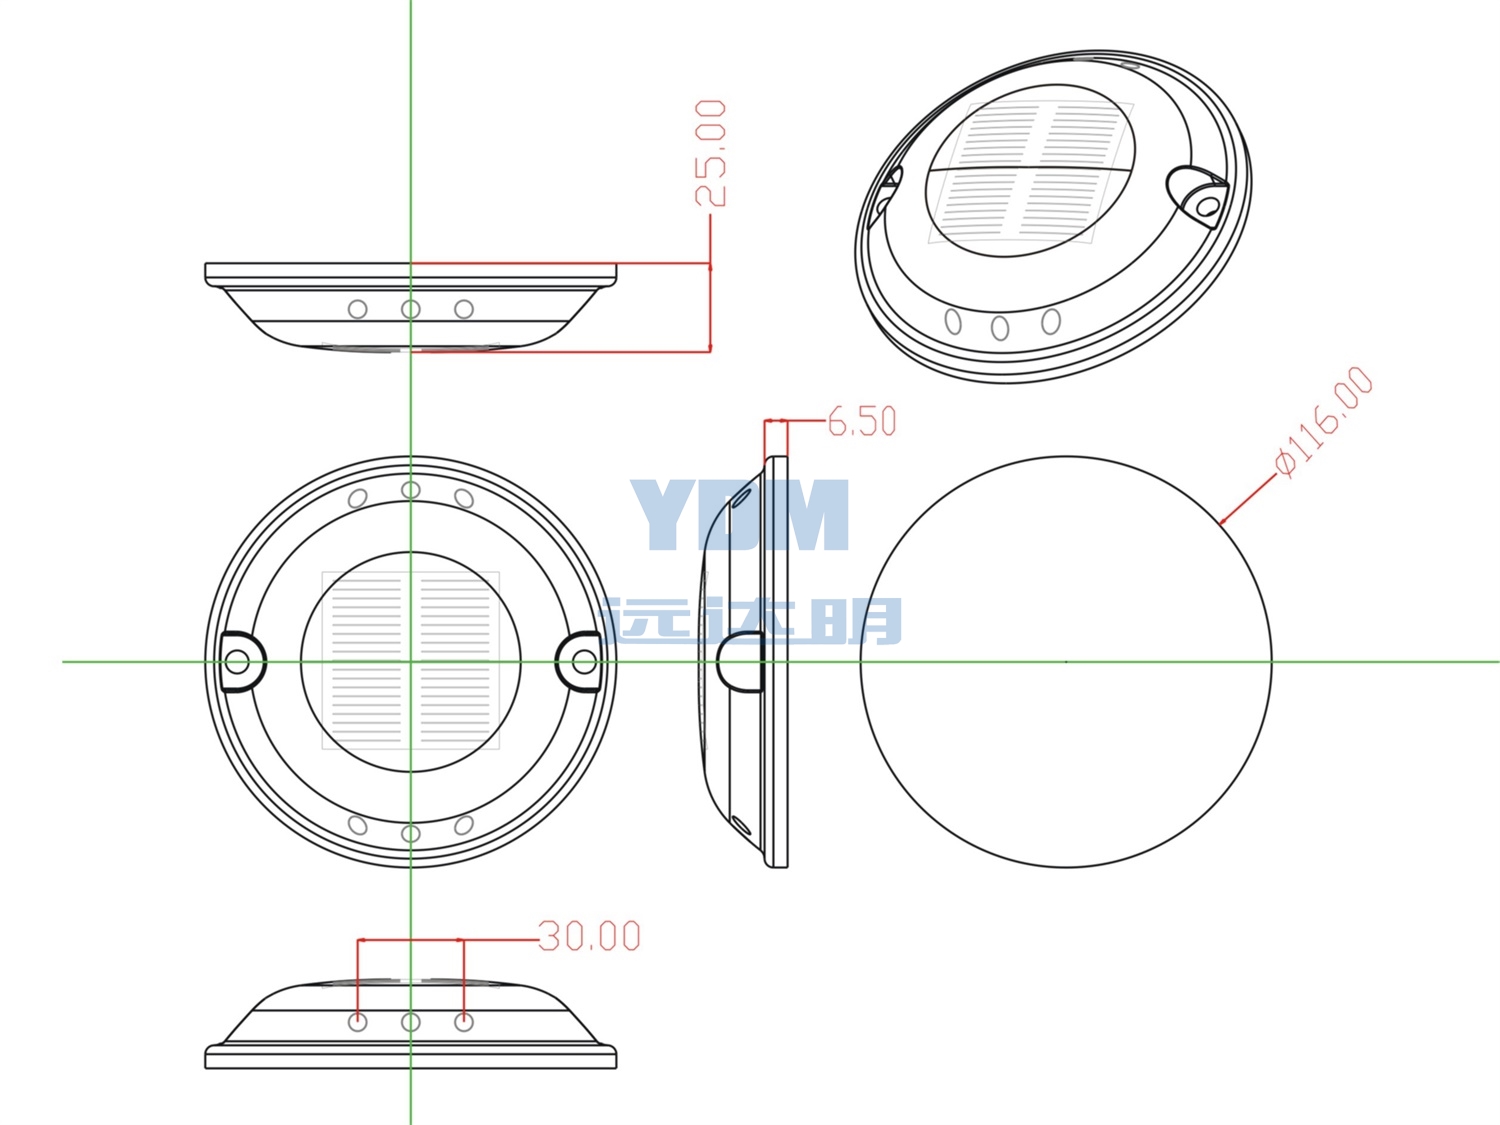
-
Item No.:
RSPS-2 -F(Flash) -S(Steady)
Key Features:
YDM 1st solar road stud, over 22 years history. Smooth shape without sharp corner.
Spot lighting:
Polycarbonate epoxy filler
116Ø*H25mm
0.292kg
Red blue green yellow white
IP 68